I had the pleasure of finding this little gem of a kit late on the final day of Wonderfest 2005. Sculpted by Ray VanDamme of Exousia Studios, it consists of 7 resin pieces and two glass eyes. This was planned as the first of a series of dragon heads. As of June 2006, this is the only one of the series to, so far, be offered. I truly hope the Ray finds the time and inspiration the continue with the series. I would love to add more of these to my collection of kits.
The bust, if that is the proper term for a kit like this, is well engineered with very little seam work required once the pieces are assembled. The breakdown is as follows: upper head and neck as one piece, lower jaw, tongue, two lower horns, two brow ridges with upper horns, and two glass eyes that fit neatly between the brow ridges and the upper head. The rest of what you see was scratch built.
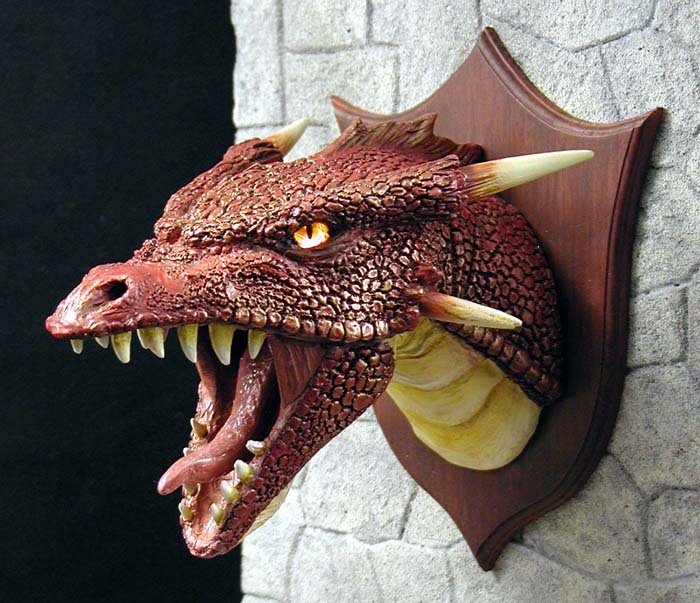
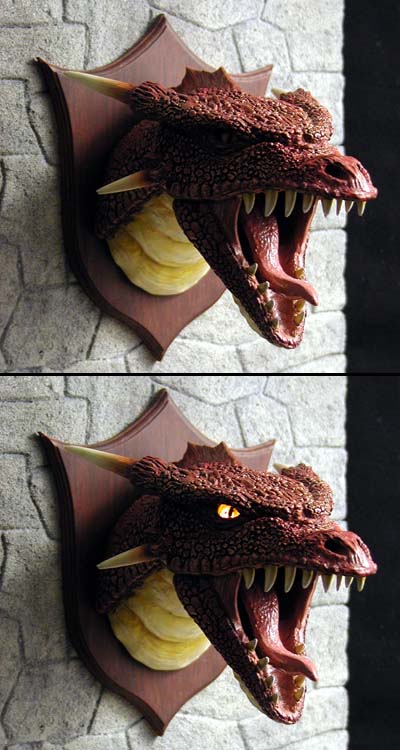
As a straight build, the dragon's head is simple with well fitting parts. What complicated the project for me was a challenge to light the eyes and add smoke to the nostrils. In the end I was only partially successful as the smoke generator failed shortly after the installation. The neck of my kit was partially hollow with a large air bubble in the rear. This gave me the room I needed to line up drill holes to intersect the eye sockets and the nostrils. In a couple of places the bores left paper thin areas in the roof of the dragon's mouth from the nostrils, but this was easily fixed with a bit of epoxy putty to resculpt the mouth textures over the bore holes. Two amber LEDs were mounted in the eye sockets before the glass eyes and brow ridges were attached. A vinyl tube was installed inside of the head to run from the nostril holes to the smoke generator as plumbing. Both items were then wired to a switch and power connection so that the display could be run off of a pull-in transformer. All of this seemed to work fine, except the wiring for the smoke generator broke free from the base of the generator leaving no place to reattach it. As a result, I don't know if smoke would have curled up from the nostrils as planned, or not.
The paint scheme deliberately followed a classic red firebreathing dragon. I used three different shades of red on the hide for the various highlights and shadows. This was followed with a thick black wash--almost a glaze--to bring out the separate scales and to accent the areas around the eyes and nostrils. Bronze was dry brushed over the scales and neck ridge. The horns, teeth and underside of the neck were base coated in an antique white. Yellows and bronze were used to detail the teeth and neck while the base of each horn was shaded with burnt sienna and raw umber.
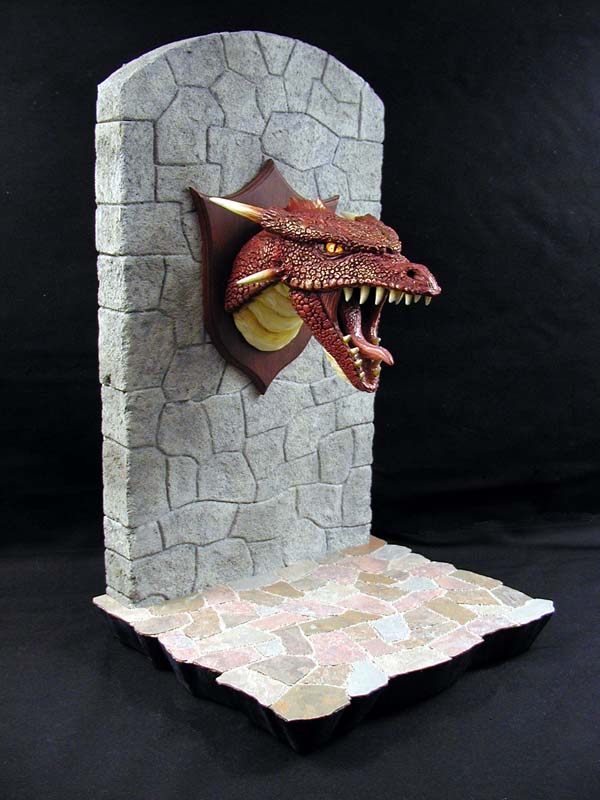
Mounting the head required creating some sort of display. Since the head was cut vertically at the neck, it seemed natural to mount it trophy style. To do this I had to create the wall plaque. I started by laminating three sheets of styrene to get the desired thickness. Yes, that plaque is plastic--not wood. I routed the edges using a mini router bit and router table for my dremel tool. After sanding, the piece was base coated in a terra cotta color and allowed to completely dry. I then mixed up a wash of burnt sienna and brushed it on vertically, allowing it to leave brush strokes showing the base color through the wash--the beginnings of the wood grain. I repeated the process with a wash of burnt umber, applying it a bit more sparingly but still leaving the streaky pattern as before. Yep, simple as that.
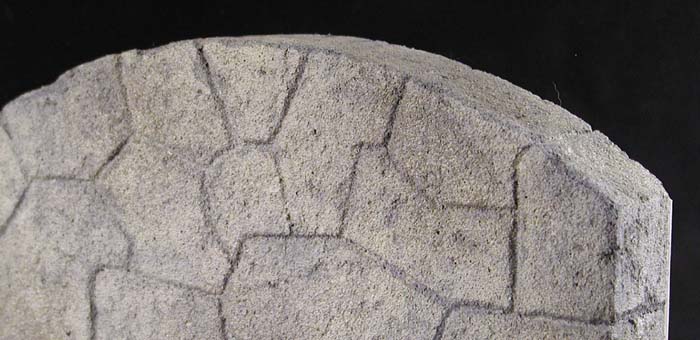
The wall and floor were simple to build. I started with two wood pieces screwed together at right angles to each other as the main structure. I then cut blocks of floral foam into 1" thick slabs and hollowed out areas in back so that the pieces would wrap around the front and sides of the wood. I deliberately made the floor pieces a little wider than the wall so that the floor would wrap around the sides. Patterns were scored into the surface of the wall pieces with a pencil and then widened and smoothed with a file. Wadded aluminum foil was pressed and rolled over the "stone" wall to add texture to the surface. This was all then covered in a couple of coats of thinned artists gesso to seal the foam. Once dry, I painted the wall with a light grey and randomly daubed on darker grey and two shades of grey-brown using a sea sponge. With an airbrush, I darkened the cracks between the "stones" with a dark grey. The whole was the lightly over sprayed with the original light grey to blend everything together. A stone wall is born!
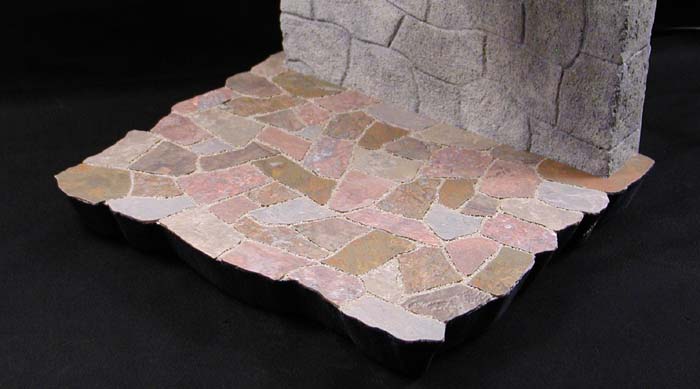
The foam work for the floor followed the same proceedure as the wall. Once the base was prepped, I started sketching out the tile pattern for the slate floor. With a pattern chosen, I randomly assigned each tile a number 1-7 and transferred it's shape to one of seven plastic laminate samples I had picked out and previously covered in tape for this purpose. (These are the same samples you would use if you were picking new laminate to resurface your kitchen countertops.) Cutting the tiles out with a bandsaw, I transferred them to the waiting floor and glued them in place. The grout lines were filled with model railroad ballast and fixed in place with scenic cement. Once everything had dried, I trimmed the edges of the foam flush with the tile pattern, deliberately undercutting it. This was then painted Payne's Grey so that it wouldn't detract from the floor. Other techniques could surely be used, but this was the best way I could come up with to create a realistic scale slate floor for my display.