

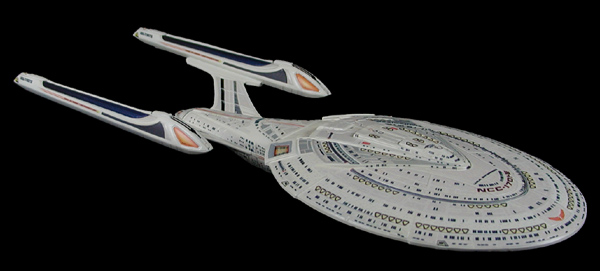
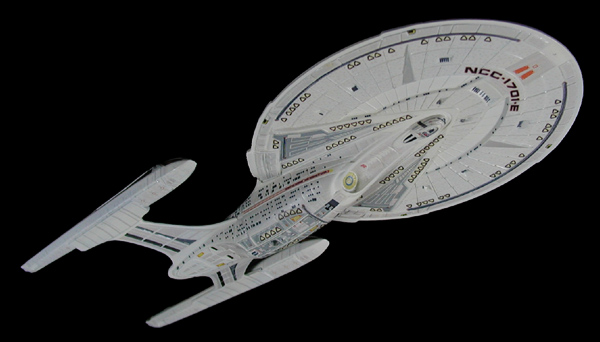
Another in the line of 1:2500 scale models from the Star Trek universe, this is the Enterprise E. Released by AMT/Ertl as part of a three ship set that included the Enterprise B and C, this model was upgraded with more elaborate and detailed decals by David Tomita of Absolute Models. Previously I used David's decals on the little Enterprise C model also found in this gallery.

There is little to be said about the process involved with this particular build up. Unlike the Enterprise C, which had some painting detail before the decalling process, this kit was assembled and painted straight from the box. After the parts were assembled, seams filled and sanded, and the kit was primered a base coat of Ivory White was applied to the entire model. A few coats were needed for proper coverage--as is typical of very light colors such as this. Once the paint cured a couple of coats of Future was sprayed to even out the slight paint texture and provide a gloss surface for the decals that would follow.
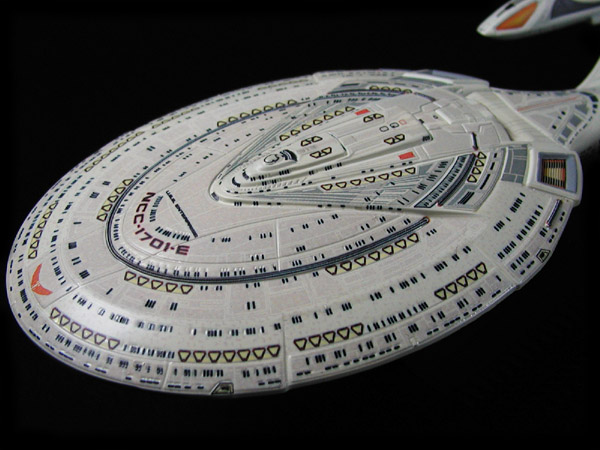
It took about one week of spare time to apply all the decals and get them to settle over and into all of the surface detail. Decal setting solution was used liberally to get the film to conform. One caution for those reading this that haven't used such solutions--be sure that the decal film is properly placed before using the stronger solvent over the film as it will soften the film considerably. Trying to shift the film while it's in the softened state will almost certainly ruin the film. Also of note, do not prod the film into the creases and cavities at this time. The solvent will cause the film to settle into the recesses. The only thing you should need to worry about is small air bubbles beneath the decal. If these are present you can carefully puncture the bubbles with a sharp pin to let the air escape as you apply more solvent to these locations.
Even the most careful handling of complex decals such as these can still result in some stretching and distortion as can be seen by some of the window alignments in the detail picture below. This is as much a product of the softening of the decals by the solvents as it is any registration issues with the decals themselves.
Once the decals had a chance to fully set up (I let them sit for a couple of days after they were all in place), a clear coat of Future was applied over them. Why gloss again? The gloss coat helps even out any finish differences between the decal surfaces and the remaining painted areas of the model. With a build such as this where the decals cover fully 90% of the surface this gloss coat may not have been necessary but it's better to maintain good building habits. After the clear gloss was dried a couple of light coats of a clear satin lacquer were sprayed to tone down the sheen.