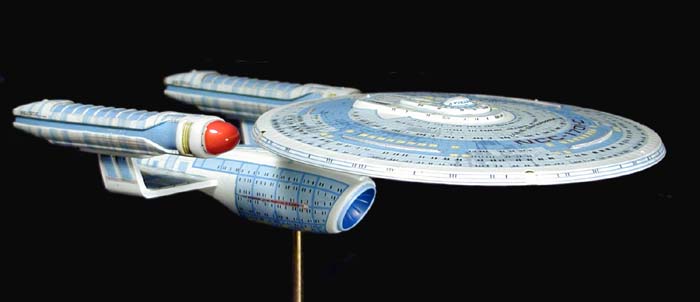

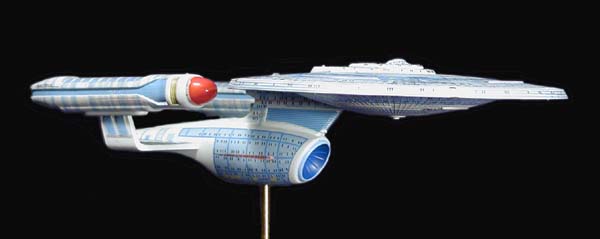
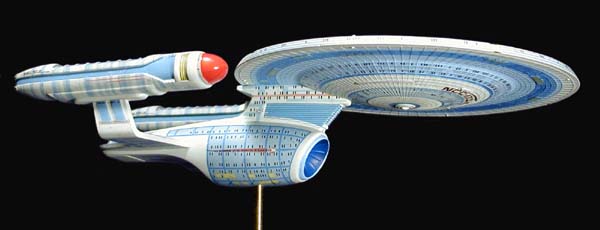
The Ambassador class Enterprise 1701-C, captained by Rachel Garrett, altered the future of the Star Trek universe when it came to the aid of a Klingon outpost being attacked by three Romulan ships. Although the ship was lost, the Klingons were so impressed by the valiant fight that the foundations of an eventual alliance were formed that day. This is the 1/2500 scale kit by AMT/Ertl of that pivotal ship--enhanced with decals by David Tomita of Absolute Models.
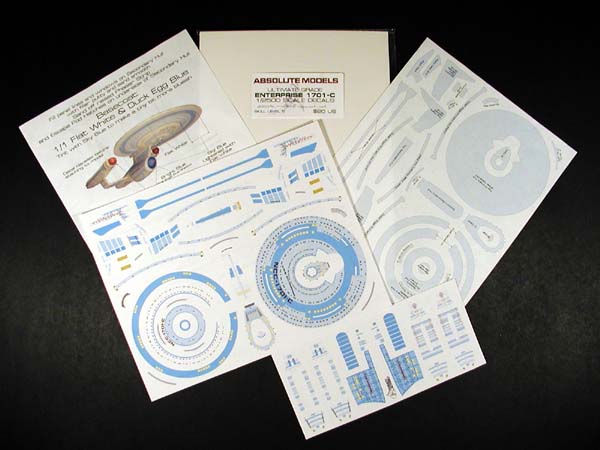
The driving force behind this project was the chance to try out the decals made by Absolute Models for this kit. The package includes two complete sheets of decals, two pages of matching templates to cut out the decals, and one painting and application instruction sheet. It should be noted that these decals are listed as a skill level 5...and, believe me, they mean it! Once all of the decals are placed, approximately 90% of the model will be covered. Setting solution is a must, as they need to lay over complex curves that would be impossible without the solvent.
Prepping the kit involved building subassemblies of the saucer, secondary hull, and the two warp nacelles. All of the panel and window detail on the lower hull had to be sanded and filled. The phaser ribbon and the liftboat rectangles were also removed. The details on the saucer were left untouched, as per the decal suggestions.
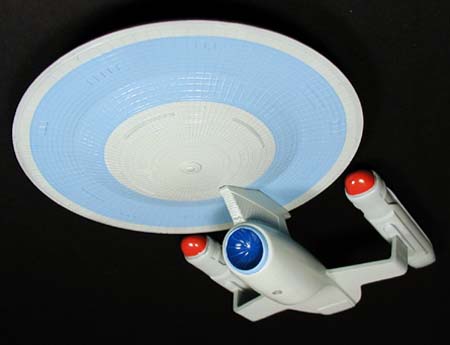
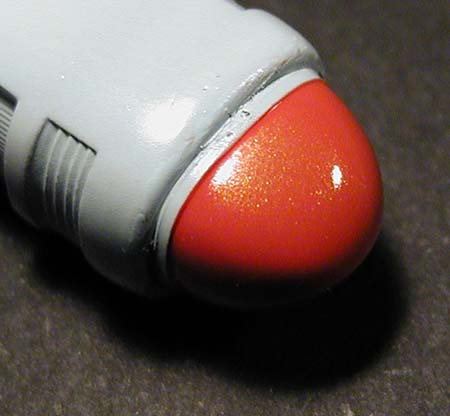
Basic color selection was per the decal instructions. The hull was painted a mixture of ten parts Flat White, ten parts Duck Egg Blue, and one part Sky Blue. The trim around the sensor dish and the ring on the lower side of the saucer was painted Sky Blue lightened with Flat White. The dish was painted Bright Blue with Blue Angle Blue darkening the outer edge. The Bussard domes were painted Italian Red with the four flat sides misted with Turn Signal Amber for effect. The entire model was then given four coats of Future Floor Finish in preparation for the decals.
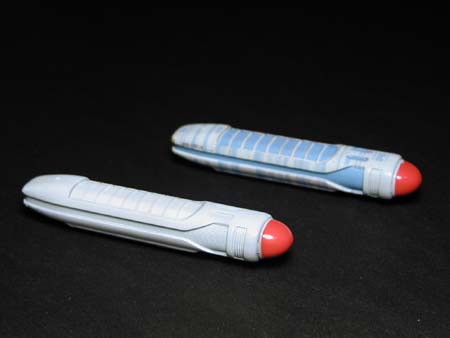
Decalling began with the nacelles. They were the smallest objects and, I thought, the least intimidating. Each nacelle required 12 decals to complete. Shown below is one nacelle nearly complete beside one that had not been started, for comparison. I chose to use Walther's Solvaset (since it was what I had at hand), but it probably would have been better to use a solution not quite so strong. I had trouble early on with the solvent. The decals are very thin--great for hiding their edges, but making them very fragile--which made it difficult to position, remove the air bubbles and snuggle down to the surface without wrinkling or splitting. This was a long process.
The secondary hull presented the complex curves of the main body and the ribbed neck detail. Like the nacelles, these presented more difficulties. Several applications, over an extended period were needed to get the decals to conform. This is were I experienced the one shortcoming with the decals as printed. the blue shapes that cover the neck ribbing were too short to meet in the middle and still cover the full depth across the neck. By this time I was getting the hang of the decal application, but the extensive surface detail of the saucer was still to come.
As it would turn out, the saucer was actually the easiest to cover. Perhaps it was a matter of experience I had gained, or just the fact that the surfaces were relatively flat compared to the previous parts. Still, there was the issue of removing the air bubbles from beneath the large decals. All of the surface detail left large numbers of pockets that had to be dealt with one by one to remove the air. I thought I had all of them resolved, only to find out later that I still missed some. AARRGGHHHH!