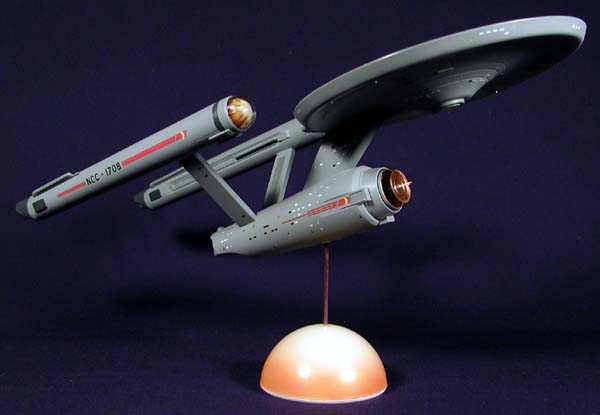
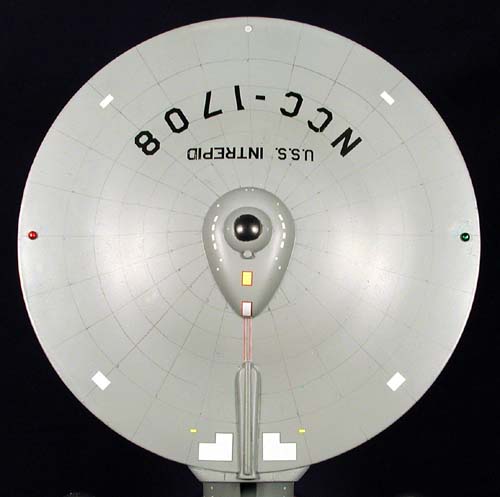
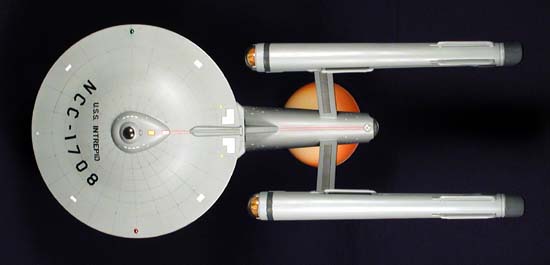
"Intrepid, you say? It sure looks like the Enterprise to me." Take a look at the ship's number and you'll notice that it doesn't sport the well known NCC-1701. Truth be told, the only difference between this ship and the famous Enterprise of Star Trek fame is the change in numbers and the name emblazoned on the saucer.
Okay, why the change? Well, when this kit was first introduced, it was proposed at a local modeling club that we build the entire original fleet to be displayed at the various shows in the area. As each member volunteered for the different ships, I chose the U.S.S. Intrepid--supposedly, the only ship in the fleet to be manned entirely my Vulcans. While this ship was mentioned on one of the original series episodes, it was never shown. I chose to model it in mid-series configuration.
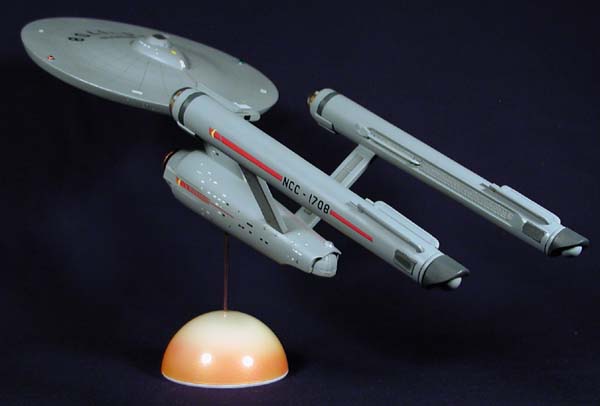
Made by Polar Lights, this is a 1/1000 scale, snap together kit with over 50 pieces, allowing the modeler to build it in any of three configurations with decals for five different ships. Decals for other ships of the fleet are available through sources on the Internet, or can be created by the modeler on the computer. In this case, I needed decals from an outside source for the name and number of my chosen ship.
As a snap-together model, some compromises had to be made in the assembly design compared to what one might fine in a glue together kit. Even so, to overall engineering of this kit is excellent. The one area that is the most difficult is on the lower hull where the two engine pylons meet the body. These pylons are a two-piece assembly that is captured by the two halves of the lower hull...leaving a rather awkward transition that has to be filled and sanded to match the hull. Another awkward spot is at the top of each pylon where the nacelles attach. While it is a clever method of snap-together construction, it is also easily damaged and requires care when assembling.
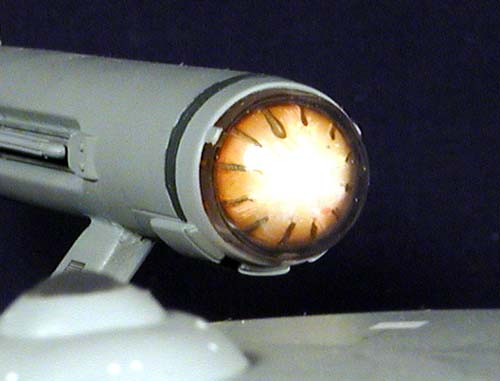
Once the configuration of parts had been decided, the next biggest decision was how to detail the domes at the front of each nacelle. The kit provided both an inner and an outer dome, both molded in clear styrene, so that the modeler could get creative with paint, lights, or both in representing this feature of the ship. I chose to use paint only in this build-up. Since this feature of the ship wasn't consistent from one episode to another--sometimes shown in red tones, sometimes yellows, sometimes whites--I took a bit of creative license with mine. Working with the inner dome, I first painted the inside surface white (flat or gloss, it doesn't matter). Then, on the outer surface, I started with Model Master Turn Signal Amber and airbrushed it on the lower edges of the dome letting it fade away toward the crest. I built up the amber color a little at a time until a had a graduated shading from dark to light as it neared the tip of the dome. Next, I took some flat white, and using a fine tipped brush, applied a dot of paint on the outer surface between and just above each rib and lightly streaked the paint down between the ribs. Once this was dry, I lightly airbrushed a bit of transparent red over the amber areas, concentrating mostly on the darker parts. The last step was the carefully paint each rib with a dark grey. The outer dome was masked so that I could paint the grey body color...leaving the dome portion clear.
I debated where or not to try creating a grid pattern on the saucer. The kit doesn't provide any guidelines for such a grid, and the episodes don't clearly show any pattern. Though it was eventually determined that the original studio model did indeed have such a grid, it could be easily argued either way. In the end, I decided to add the grid because it looked too plain without it and it would be easier to place the ship registry with the grid as a guide. Some who have built this kit have used a compass centered on the bridge dome to draw the circles. I didn't want to mar the dome with the compass point, so I decided to make a series of concentric rings from a sheet of cardstock that I could lay over the saucer as a pattern, and trace the rings with a pencil. A protractor and a flexible straight edge allowed me to add the radial lines. After the decals were added, the surface was sealed this a few layers of dullcoat.
I replaced the kit's standard base with a custom piece made from a clear halfdome from the local craft store. I painted the inside of the dome to mimic the ship's nacelle domes. A thin copper rod extends from the dome as a support for the model--copper to match the deflector dish on the lower front of the model.