Like many people, I have been facinated by dinosaurs since I was a child. My introduction came early in grade school when the teacher read the book The Shy Stegosaurus of Crcket Creek to the class. I was mesmerized. From that day I have always had a special fondness for this particular dinosaur.
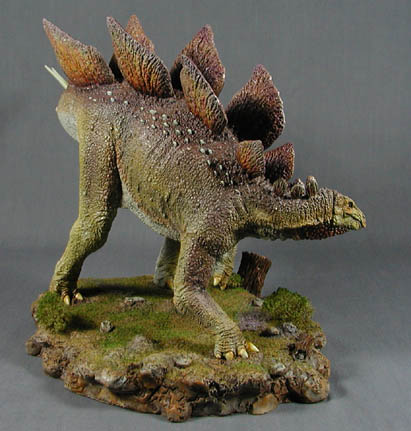
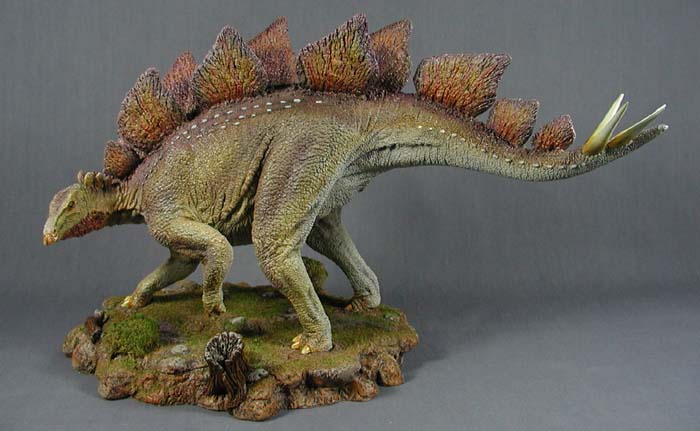
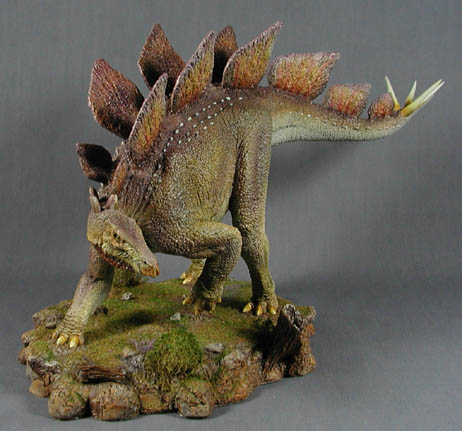
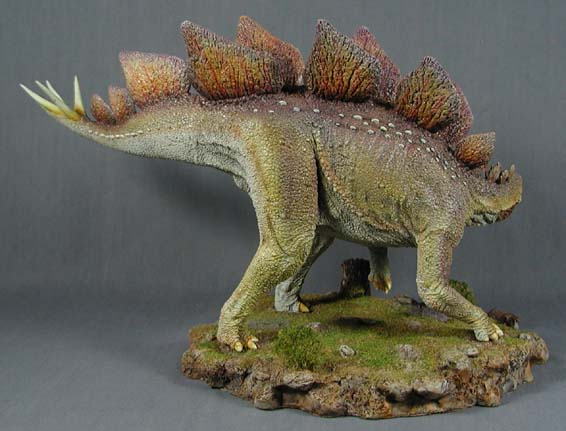
My experience building dinosaurs has been very limited, having built only two others in the nearly forty years I've been involved with this hobby. One was the Lindberg T-Rex back in 1993 and the other was a stegosaurus when I was about ten years old. I've been tempted many times since then but it was last year at Wonderfest 2006 when it all came together. First, there was a very informative class by Steve Riojas on the use of transparent paints (naturally, using a dinosaur for his demonstration). Second, at the Cretaceous Creations table was a beautiful new sculpt of a stegosaurus. It seemed like fate...I had to have that kit. The results of my efforts can be seen above and in the other images on this page.
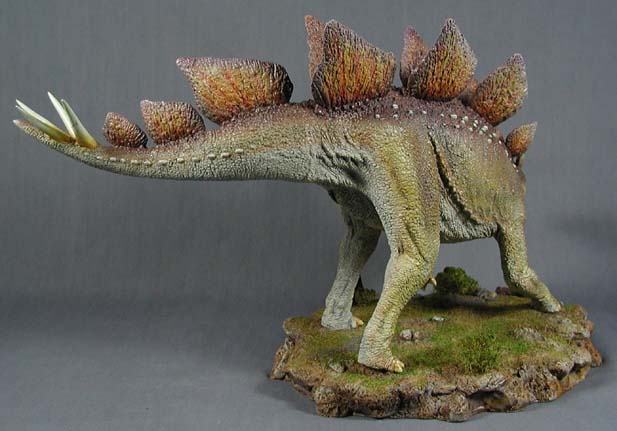
Following Steve's example, I base coated the dinosaur in Krylon Satin Almond. Over this I applied a glaze of medium / dark grey oil paint and let it dry. From there it was a matte of building up the effect I wanted using various transparent colors. Most of the paints I used were Comart Transparent paints. The base purple tone, however, was made from a mix of Dioxazine Purple and Yellow Oxide Liquitex acrylics thinned using their airbrush medium until I got a nice transparent quality.
I started by outlining the dorsal plates, the spine and around the base of each plate. I then worked my way outward along the upper back and along the legs. At this early stage I was applying the color lightly. I figured I could always go back and build up the color as I went. Bordering the purple and filling in the rest of the upper body I used transparent ochre. From there I built up the color using transparent smoke, burnt orange, ochre, and purple. I deliberately stuck to purples and yellows for my main coloration knowing that they are opposites on the color wheel and the blending would create interesting shades of brown that would reveal themselves as yellow and purple the more you looked at the creature.
Why purple, you ask? It all goes back to that book I mentioned in the beginning (and, coincidentally, that first stegosaurus I built as a kid). The cover art at the time showed the dinosaur drawn in purple and that first kit I built was cast in purple plastic. Since then, I've always associated that color with this creature. Besides, who's to say they didn't look like this?
The dorsal plates gave me a chance to give the creature a bit more color. I wanted to keep the overall color scheme to harmonize--so I chose to focus on yellows, oranges, and reds. The bright colors may act as a warning to possible predators...or perhaps to attract a mate. Again, who's to say what's right and what's wrong here. These colors were also brought to the beak and the gullet. Looking at that gullet, I couldn't help but think of a tom turkey when I first saw it. Rounding out the scheme were the ivory spots along his back to mimic the tail spikes.
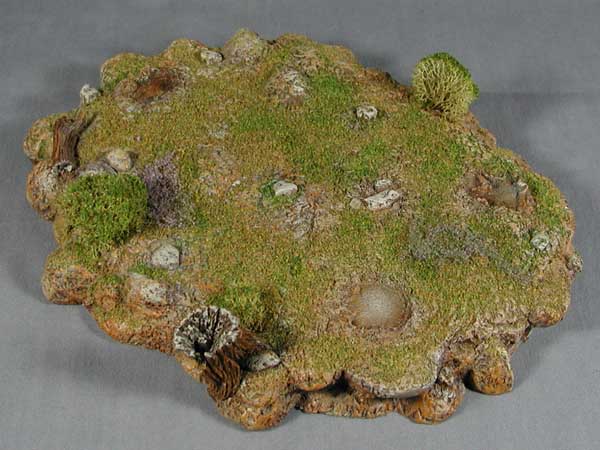
The base was painted with various shades of brown ranging from Raw Umber through light sandstone colors. Everything was base coated in Raw Umber. I then proceeded through several drybrushing steps, working my way through the Umbers, Sienas, tans, and sand colors. With each layer I was more and more selective as to which parts would be drybrushed and how heavily. I wanted the other tones to show through somewhat randomly. After this inital sequence was complete, I went back with Raw Siena to warm up and pull together the overall paint scheme. Where necessary I touched up the sandstone color to highlight the rocky outcroppings.
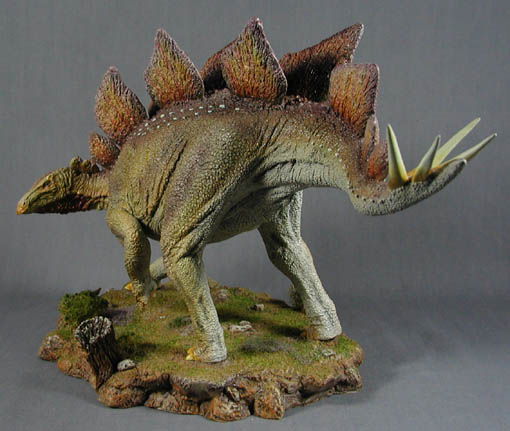
Even after all of this paintwork, I wasn't completely happy with the effect. It needed something more to take it closer to the realm of realism. It was time for the Woodland Scenics groundcover. The base was first sprayed with their Scenic Cement. While this was still wet, I lightly sprinkled their Blended Turf earth blend and let it set for a while as the glue soaked into the groundcover and affixed it to the base. Next, I mixed some of the earth blend with the green blend turf and more selectively sprinkled this over the previous layer, adding more cement as necessary. You needn't worry about the glue affecting the appearance of your finished work since it drys completely invisible with no sheen.
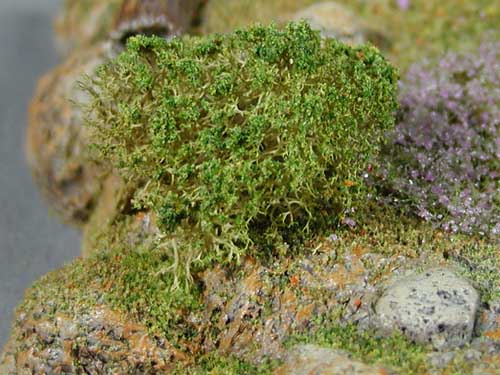
Lastly, some bushes were added to the scene to give it a bit more texture and interest. I chose some light green / tan lichen and dipped it in a shallow dish of the Scenic Cement. With the glue beading on the surface of the lichen, I then dabbed it in the remaining groundcover mix I previously used on the base after adding a little more of the green blend. This created a nice clumped foliage effect on the surface of the lichen while retaining the structure underneath for the woody part of the bush. These bushes were then affixed with some Hob-e-Tac adhesive and propped in place until the glue set up. A couple small patches of purple flowering foliage were applied to the base like clumps of clover--the color chosen to mirror the colors of the dinosaur.