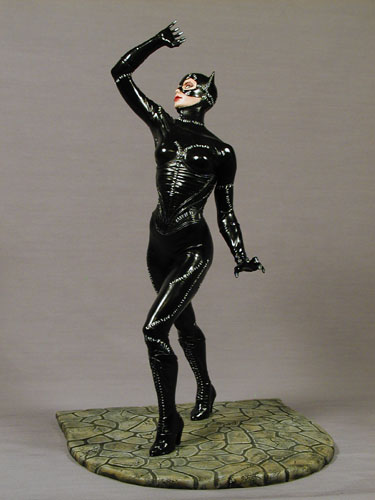
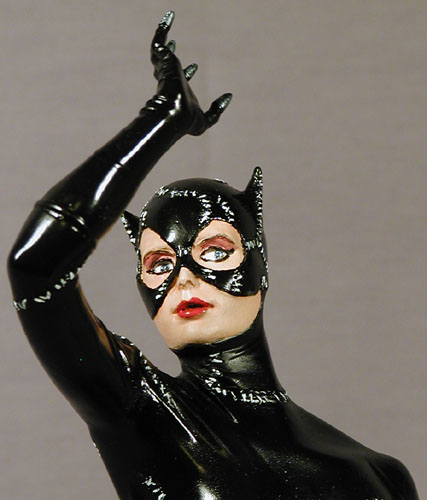
This is my attempt at the Horizon 1/6 scale vinyl kit of Catwoman from the 1992 film Batman Returns.
Like all of the Horizon kits I have dealt with, this one was first rate in quality, with a spot-on likeness. Despite the quality of the kit, this one presented problems for me all through the construction and painting.
Consisting of 19 vinyl parts, the construction seemed to be simple. The only putty work involved the shoulders and the seam where the left thigh joins the hip. All of the other parts fell along natural division lines--gloves, boots, waist, claws. This proceeded smoothly, with a lot of care at the thigh seam so that the contour would flow smoothly.
Once construction was finished to my satisfaction I applied the final coat of acrylic primer, making sure that ALL of the vinyl was covered. I had to be certain of coverage since I planned on using enamel for most of the color coats. I applied the base coat to the face, masked it with a liquid mask when the paint was dry, and then applied the gloss black in two coats to the body. So far, so good...
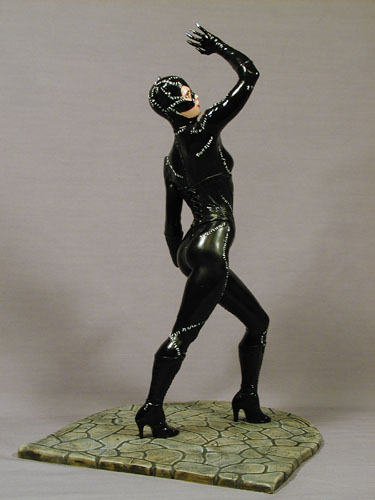
It was at this time that the kits inherent imbalance cried out. Even though she had been epoxied to the base provided with the kit, she toppled over--marring the paint and separating the seams at both shoulders. After several attempts to fix the problem I finally admitted defeat and stripped the paint to start over. In the process the putty at the hip was softened and had to be redone as well.
During the repair work I discovered that the seam to one of the boots had also worked loose. I determined to take advantage of this and removed the left boot. Since I had planned to use a resin base for the final display I used this time to drill a hole in the base and one in the separated boot. Inserting an aluminum tube into the boot, I packed epoxy putty inside the boot until it fully covered the tube and let it cure for a couple of days before reattaching the part to the kit. Once done I repeated the previous assembly and painting--this time with no more mishaps. Whew!
With the delays due to the previous troubles, waiting for the resin base to arrive, and my first trip to Wonderfest, it was summer by the time I started repainting. The change in temperatures now started to play havoc with the painting process--more troubles, more setbacks.
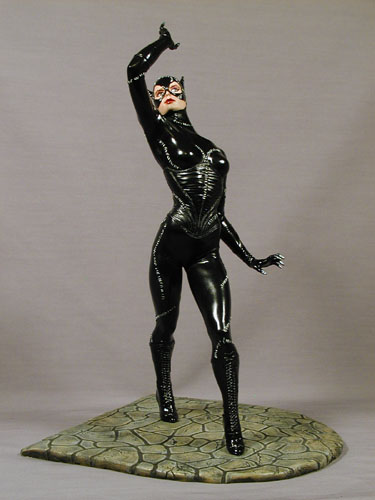
Four coats of gloss black and two coats of gloss laquer later, I was relatively satisfied with the finish. Fortunately, photographs can hide a multitude of sins.
The face was painted with the same basic color blends I used on my earlier Curly figure. Tamiya gloss red was used for the lips, while a 50/50 mix of Tamiya red and Tamiya sky blue was use for the purple eye shadow. Silver Blue Metallic was used for the irises with Artic Blue Metallic for the recess around the iris and the pupil. The purple eye shadow was not seen in the movie or on the box example, but I felt something was needed and it was a simple compromise between the eyes and the lip color. I left the skin shading very subtle since her complexion was quite light in the film.
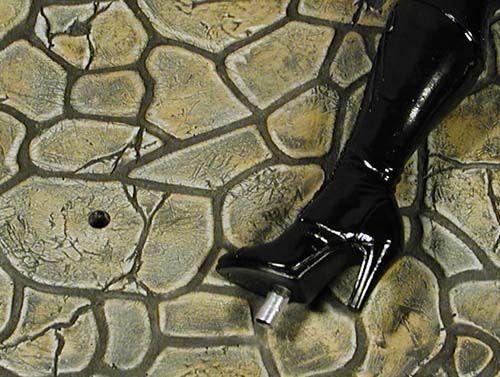
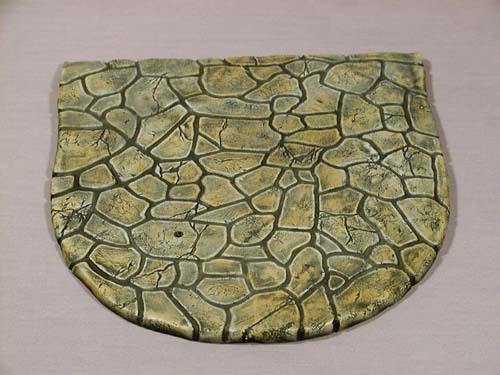
The flagstone presented it's own difficulties for me. I had never before concerned myself with painting realistic stone surfaces. With the dark nature of the film and the figure I had first assumed it would be dark greys...but flagstone is normally rather light in color.
After a lot of contemplating, studying pictures, and generally procrastinating I finally took a deep breath, figuratively closed my eyes, and grabbed some paints. I started with a medium grey basecoat. On top of this I haphazardly brushed/stippled first a dark tan, then a light tan, and finally a light grey. It looked like hell at this point...all blotchy and cartoonish. Once this was dry I put a heavy wash of Floquil Engine Black (the sootiest, blackest paint I have ever used...I love this stuff) over the entire base. By the time I had finished the wash the first areas were already drying so I immediately took a paper towel and scrubbed it across the surface to remove a good portion of the wash. After letting it dry for a while I came back with the paper towel moistened with Floquil Dio-sol (thinner for Floquil paints) and began rubbing the surface again. This time I concentrated on the individual stones, removing the black in patches. The Dio-sol also tended to cut through the stippled colors revealing the lower layers in soft, random patterns. The overall effect was better than I could have hoped.