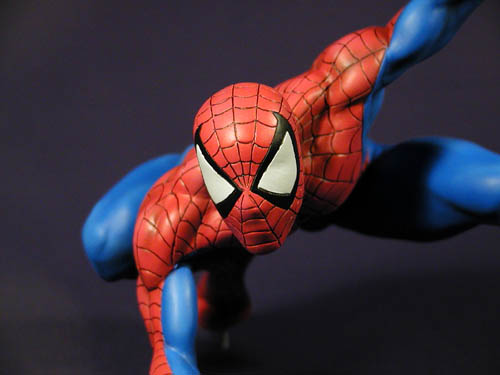
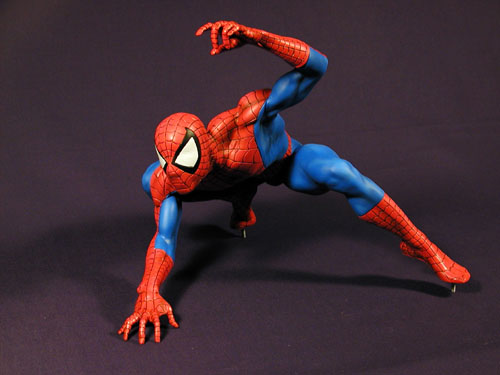
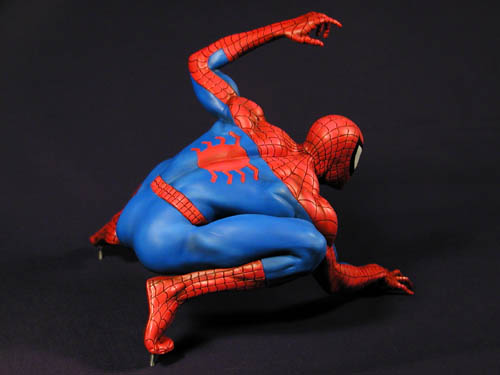
From as far back as I can remember my favorite superhero was always the famous Wall-crawler, Spiderman. When I discovered the Horizon kit of Webhead in this dynamic pose, I knew I had to have one in my collection.
When the Hero's Emporium announced their When Two Worlds Collide II contest this kit beckoned to be built as one of the two heros at the center of the diorama concept.
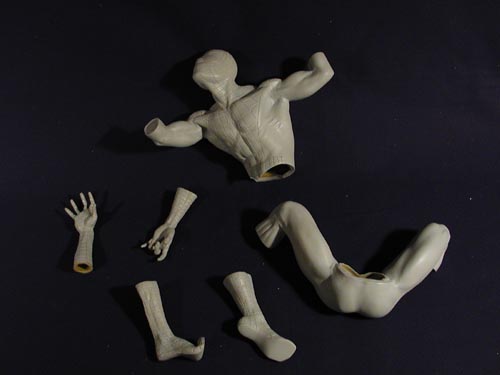
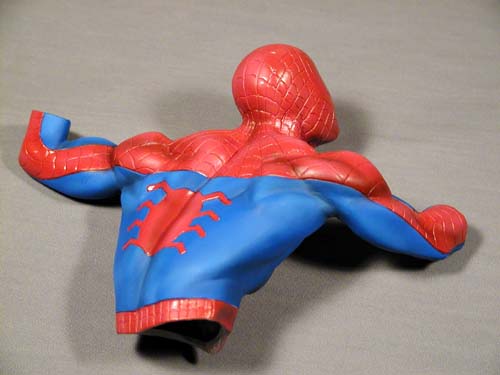
Consisting of 10 vinyl parts, the first step was to decide what order of assembly would best ease the painting chores. Fortunately, the costume made the waist a natural separation point. Shown at the right is the kit with the upper and lower subassemblies glued and puttied. The boots and gloves were left separate at this point since they would be a single color and had natural separations from the blue portions of the costume.
Acrylic primer was necessary to prevent any reaction with the vinyl, but the color coats were painted using Floquil paints. These paints are classified as enamel but have the characteristics of a lacquer base. Conrail Blue, Soo Line Red, Engine Black, and Reefer White were chosen for the costume. Straight blue and red were used for the base coats. The dark shading was a 4:1 ratio of the base color and black, while the highlights were a 2:1 ratio of the base color and white. As is my habit, all of the
shading was applied with an airbrush. It was necessary to keep in mind both the orientation of the figure in the planned diorama and the relationship of the sub-
assemblies to each other in order to keep the shadows and highlights aligned with each other and the vertical nature of the setting. One of my tendencies is to keep the color changes subtle, but in a comic book character exaggeration of shading is the standard and here I don't feel I was very successful. The figure looks good to my eye, but the color changes don't show well in the photos--leading me to think I was still too light-handed.
Before attaching the boots it
was necessary to deal with
how the figure would mount
to a vertical surface. I wasn't
confident with just using a
brass rod or two, thinking the
figure could still fall. I had to
install screws to anchor the
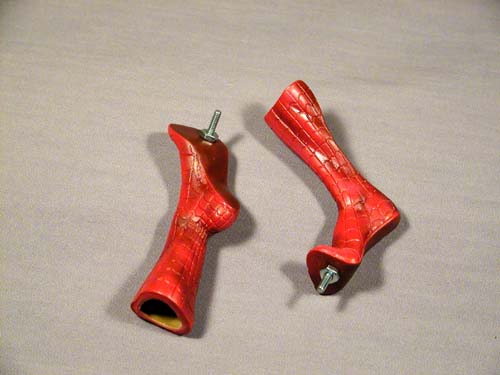
kit securely. To do this I
drilled a hole in the sole of
each boot and fed a thread
up through the hole.
Attaching a loop to the bottom
of the screw I drew the thread
back down through the hole
to make sure the screw would
be properly lined up with the
hole. Using a riffler file, I was
able to reach inside the boot and push the screw through the hole with a little assistance from the thread as a guide. Once the screw was through the hole I attached the nut to make sure the screw was seated fully and was perpendicular to the sole of the boot. I then packed the inside of each foot with epoxy putty to make sure the screw couldn't be pushed back into the boot. Once the putty had set up I was able to glue the boots to the legs and deal with the little touch up painting involved.
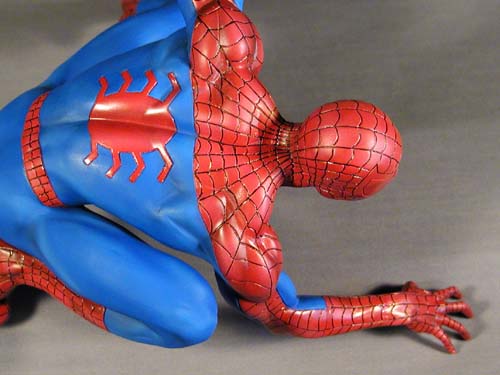
The spider on the back of the costume in engraved into the kit so it simply required burnishing the masking tape to reveal the outline and trim along the lines with a hobby knife to expose the spider for painting. It wasn't until all of the masking was removed that I was able to see if my color choices worked. At this point I had a little touch up to do where the overlap between colors either bled through or received no color at all...well, it happens.
Before gluing the upper and
lower halves together I started
picking out the black weblines.
I had intended to do just those
parts that would be impossibe
to reach after assembly, but I
found myself doing all of the
webbing before gluing.
Rather than trying a wash or
using a fine line brush, I put
my technical pens to use.
Using a .35 mm pen and black
india ink I drew in each line.
This took about 4 hours with a
couple of interruptions to
complete. The black around
the eye and the eye itself were
the only areas that were brush
painted. Straight black paint was used for the edges of the eye. The light part was painted with a 19:1 mix of white and silver to give the eyes just a hint of pearlescent sheen...another detail that doesn't show up well. Once the whole kit was assembled and any last touch ups were complete, the figure was sprayed with a couple coats of Floquil dullcoat.
The final detail was to make sure both feet and the right hand touched the surface
and weren't cocked to one
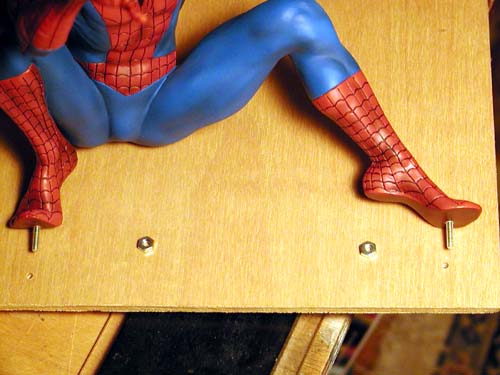
side or the other. Taking a
scrap piece of 1/4" plywood,
I drilled a couple of holes at
the proper spacing for Spidey's
feet. With the holes drilled I
heated the figures legs with a
heat gun and inserted the
screw ends into the holes
while the legs were still pliable.
Once the screws were secured
from the back with the nuts I applied some heat to the extended arm and hand to make sure all of the fingers
touched. After the figure had a chance to sit and cool for a while all that was left was to take some final pictures.
