Building a wall...
Building a wall...
From the moment I decided on the two main characters in my contest entry I knew I needed a wall on which to display them. What the materials would be and what configuration it would take was something that would evolve as I thought out the details of the diorama during the construction of the figures.
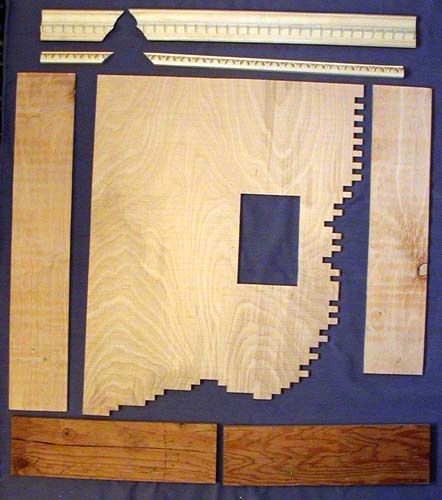
Ultimately, I decided on 1/4" plywood for the main wall pieces so that it would be thin enough for the figures to bolt in place and still be strong enough to hold it's shape. I always envisioned it along the edge of the building and chose to put it at the top so that Robin's batrope would have a place to anchor. This led me to the top corner "puzzle piece" look of the display.
To determine the cuts I needed to make on the front panel of the wall I first loosely arranged the three figures to get an idea of the overall dimensions I would need and where the rear structural pieces would need to be. With this information I marked the approximate location of the window cutout and then proceeded to draw evenly spaced lines across the face of the piece representing the brick coarses and allowing for the thickness of the ledge moulding. Knowing that I intended each brick to be 1/2" by 1 1/2" (including the mortar spacing), I plotted out the end of each row of bricks and marked it on the board. Using a razor saw I proceeded to cut out the panel. Once cut, it was a simple matter of some glue and brad nailer to assemble the pieces into the wall seen here.
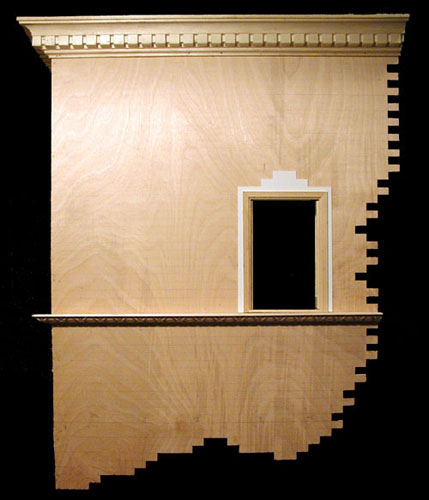
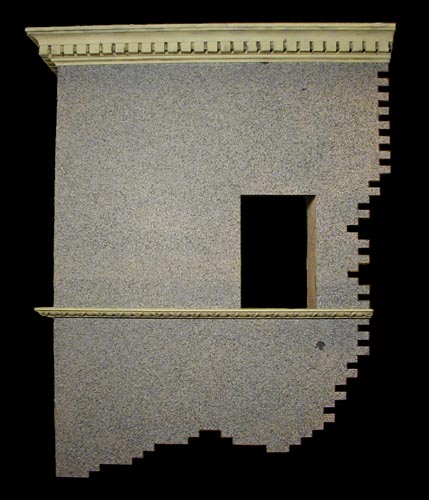
With the wall assembled it was time to start the painting. Why start painting now? I planned to tile the wall with styrene "bricks" to give the wall a realistic texture. This meant that I needed to have the mortar layed first. To simplify this step I decided to use Krylon Make It Stone textured paint. I sprayed the entire wall, including the ledge, cornice, and window frame. Once the first coat had set up I came back and gave the main wall portions a second coat--this time avoiding the moulding so that I wouldn't bury their details under the applied texture. Once this was fully dry I painted the mouldings and window frame with Floquil Antique White and then came back with Floquil Weathered Black for the random shading/grime on the detail parts.
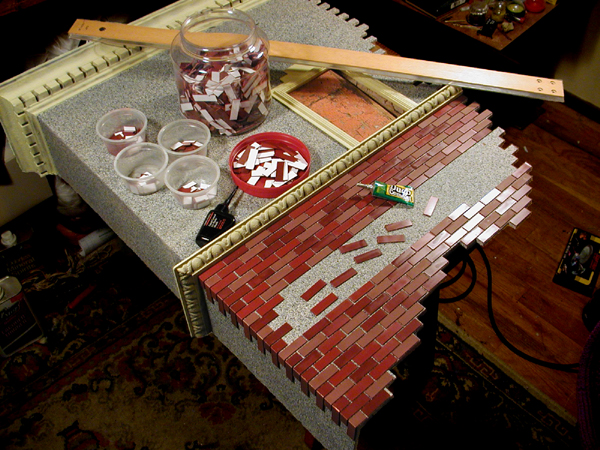
Now came what I thought would be the tedious part--making the bricks and applying them to the wall. With the company of some classic movies on DVD this was actually a rather enjoyable several evenings.
The bricks were cut from four 11" x 14" sheets of 0.060" styrene. Each brick was roughly 7/16" x 1 7/16" so that there would be a bit of spacing between them after they were attached to the wall. As each sheet of bricks--225 per sheet--were cut, they were stuck to the adhesive side of a sheet of contact paper and thumbtacked to a styrofoam board. Each of the four sheets was then painted a different shade of red...mixing them from Floquil paints--Oxide Red, Tuscan Red, and Soo Line Red. I made sure to also cut some half-bricks from the scrap of each sheet and paint them as well so that I could deal with the corner bricks and the rows that would end in a half brick.
The tiling process started by making the corner bricks by bevelling one edge of a half brick and I like-colored full brick and gluing them together and onto the corner of the wall. Once these corner bricks were established I could lay a straight edge from the brick to the cutout pattern at the other end and use this as a guide for laying each coarse. All of the brick tiles were mixed together in one jar and drawn out at random to keep from clumping together too many of any one color for a more natural look. Not sure what glue would be best under the circumstances, I settled on the old reliable Duco Cement with no problems. With the windows stained and remounted in the frame, this last detail was glued in place. All that remained from the outside was to mark the locations of the mounting holes for Robin and Spidey and drill the holes through the wall.
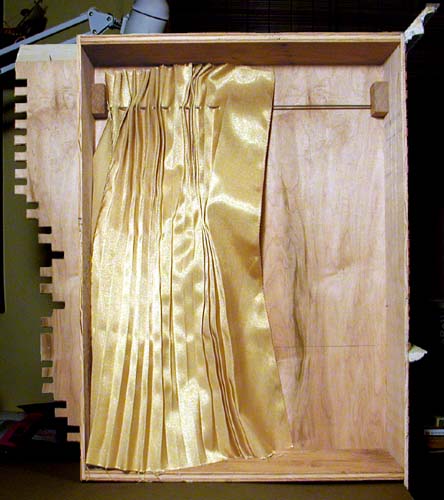
One final detail remained before I could consider the project finished. I had to take care of the curtain that would be behind Mrs. Peel as she stood at the window. Without a curtain I would have had to simulate an entire room around her! I wasn't about to go that far...I'm not THAT crazy. Digging through some old scraps of fabric I found some heavy satin-like material that had been used years ago for some throw pillows. Cutting a piece to length, I ironed in 3/4" accordion fold pleats and stuck a stiff wire through the fabric as a curtain rod. Anchoring the rod in two blocks, I glued it in place and put Mrs. Peel behind the window. DONE! Whew!